Creating Projections
Best practice is to ensure all the individuals, entities and goals for the client group are added before adding projection data. This will allow you to link projections to these records.
Projection data is accessed from the left navigation bar after selecting a client group.
Step 1: Assumptions (optional)
On the projections page there is an expandable section titled 'Projection assumptions'. This section has a free text area to add the assumptions used for your projections. It also allows you to upload files.
Step 2: Projection records
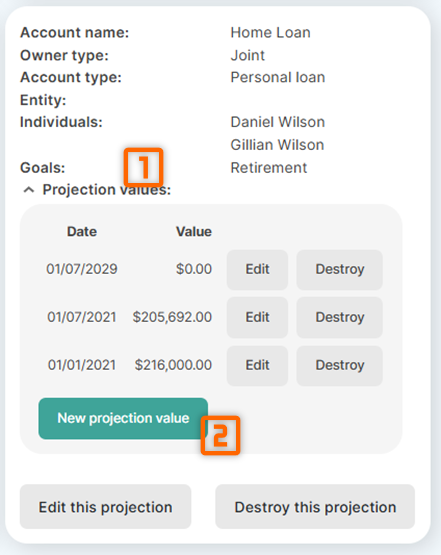
The other expandable section is titled 'Projections'. This is where the details are stored about the projected accounts, allowing you to link each projection to an owner and one or more goals as required. Linking to goals will result in the 'How are you tracking?' dashboard being populated.
The number of projection accounts to set up is up to you. For example, you could have a single superannuation projection capturing the consolidated superannuation balances for all individuals, or you could set up a superannuation and pension projection for each individual. For projection software such as Xplan XTOOLS+ and RetireMap Quantum the latter is more efficient, as they output individual accounts.
Step 3: Projection values
Once Step 2 is complete, the projected values for each record can be added. This can be done manually, or through CSV import.
Manually adding projected values
Simply find the projection record in Step 2, click on 'Projection values' to expand that section, then click on 'New projection value'.
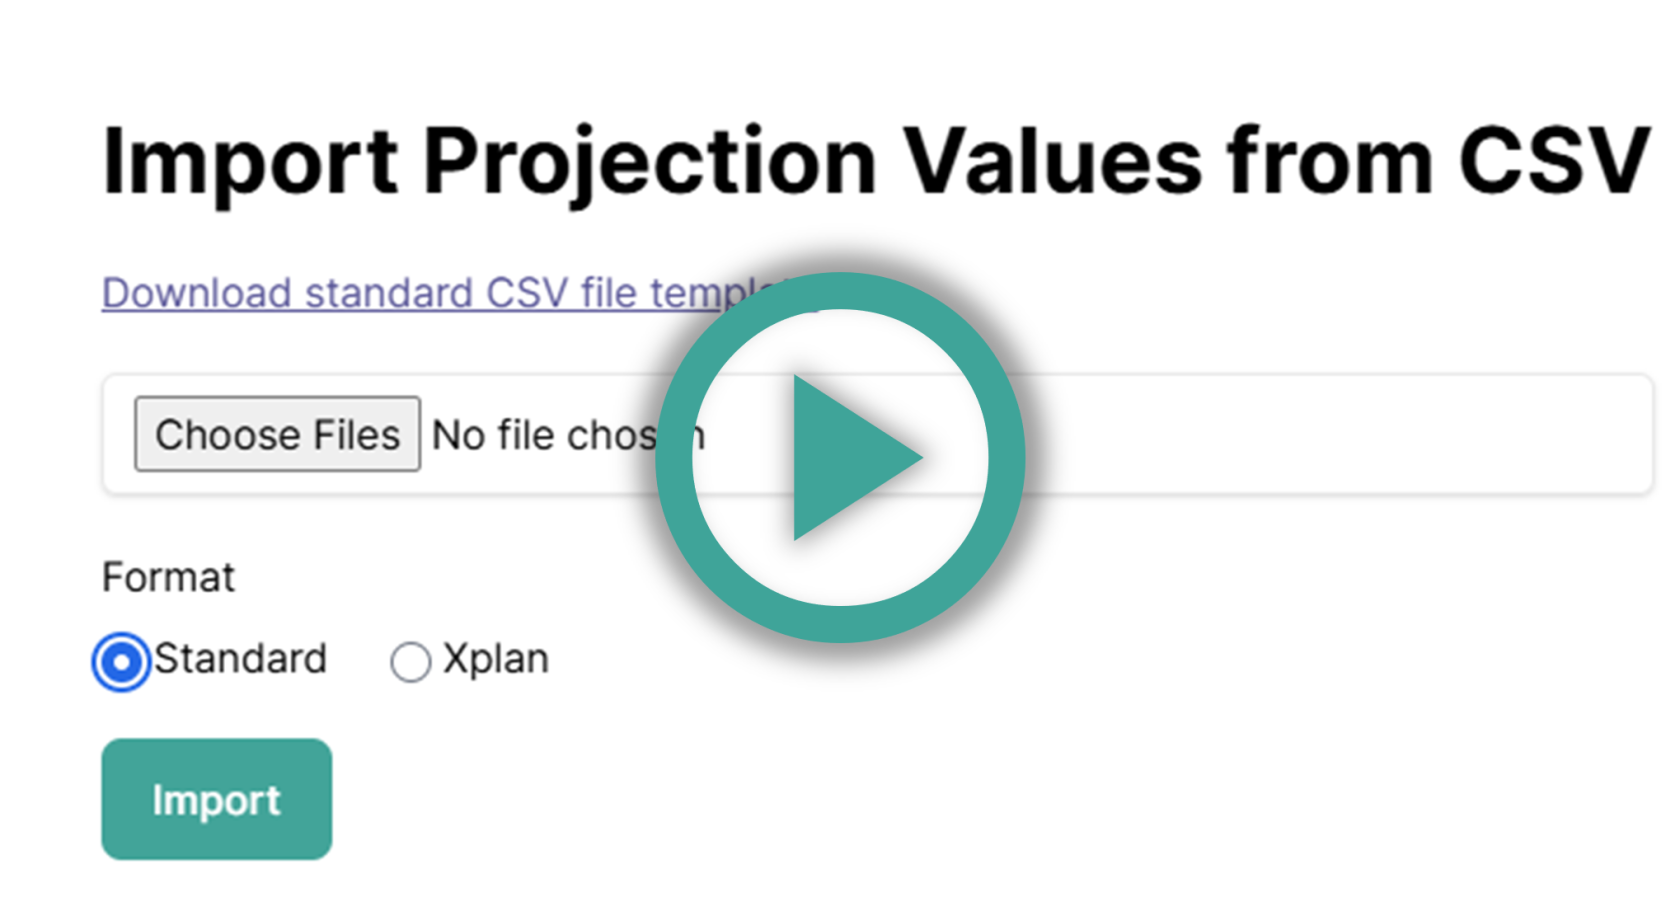
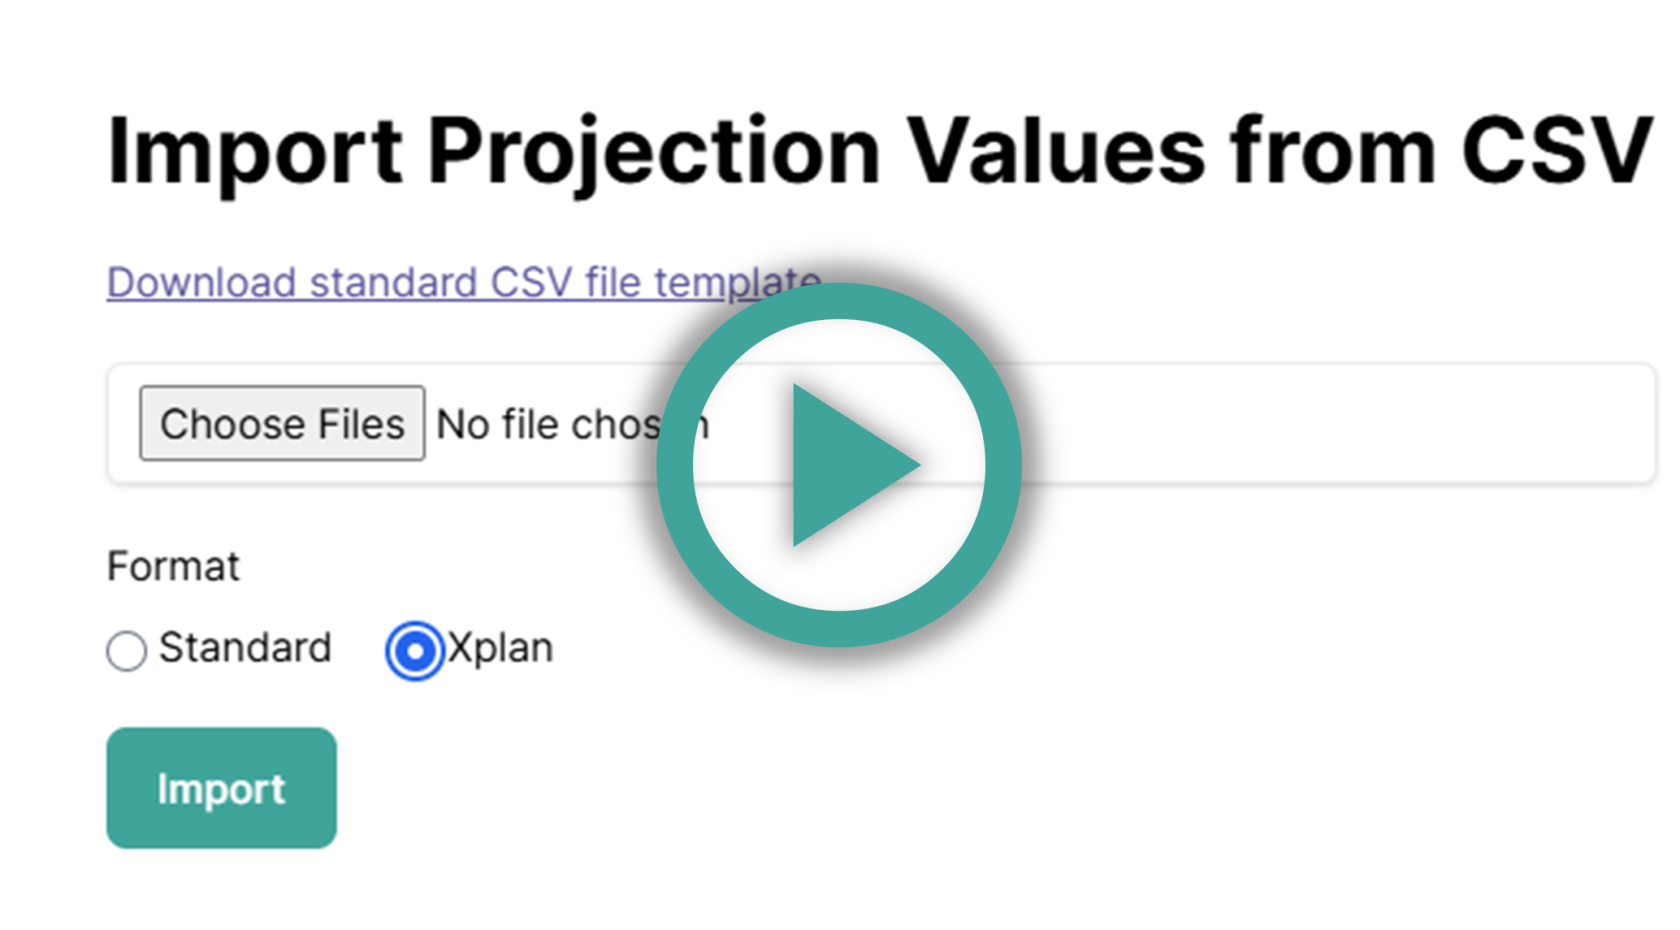
Importing projected values from CSV
Beegle has the functionality to import projected values from CSV files, either in a standardised format or directly from Xplan XTOOLS+ CSV files.
In either case, there are a few requirements that must be met for the upload to be successful:
- The projection account names in the CSV must match exactly the projection account names as set up in step 2.
- The CSV files do not need to contain a record of all the projected accounts saved in Beegle, however the CSV files must not contain any projection accounts that are not recorded with Beegle.
The software will provide a descriptive error, to assist in finding any issues with the provided files.
The specific instructions for each CSV upload option follows.
- Standardised format
 |
- Xplan XTOOLS+ format
 |
Other options
Beegle is working with third parties to allow import of projection values through integrations. As these integrations are added they will become available as an option alongside the CSV Import button. Details of integrations will be made available here.